# FizzGate integration platform access Nacos tutorial
# Preface
The FizzGate integration platform supports access to the Nacos registration center and configuration center (only Naco2.x server is supported after v2.6.1). The following describes the steps for the FizzGate integration platform to access Nacos.
Nacos version requirements: v2.0.4 or above
# Access Nacos registration center
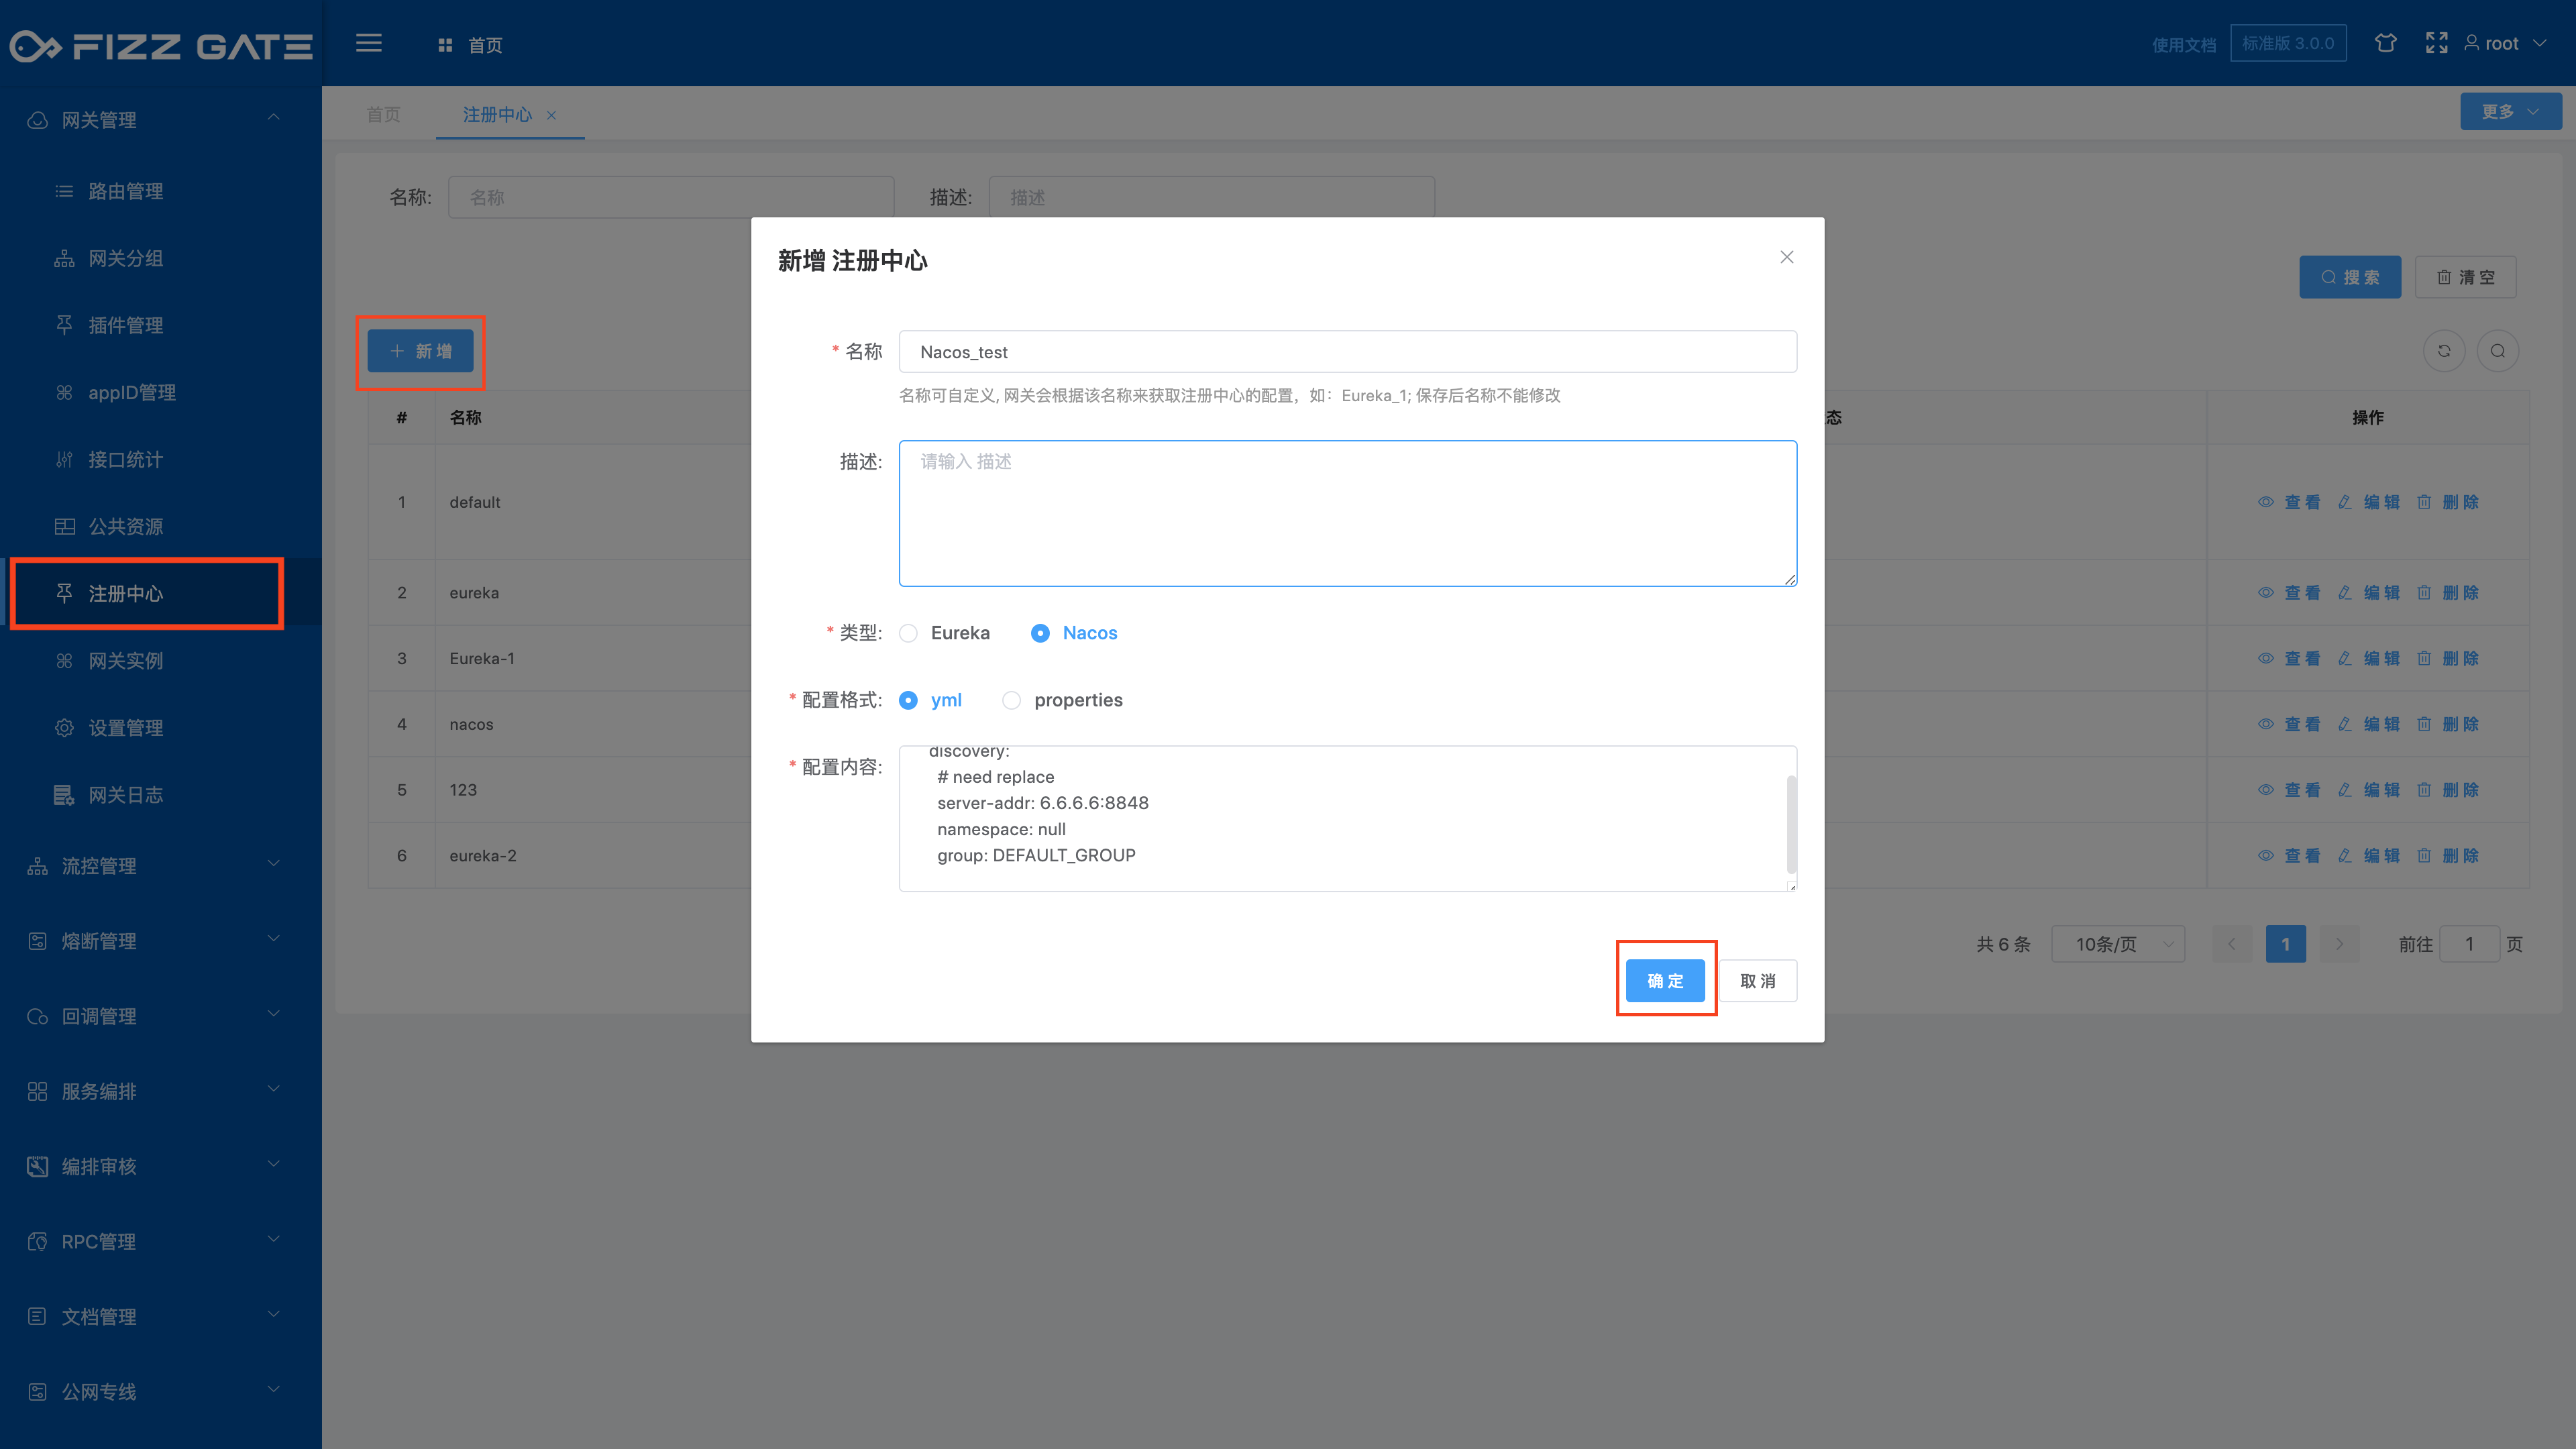
Add Nacos registration center in the background -> gateway management -> registration center function, as shown in the figure:
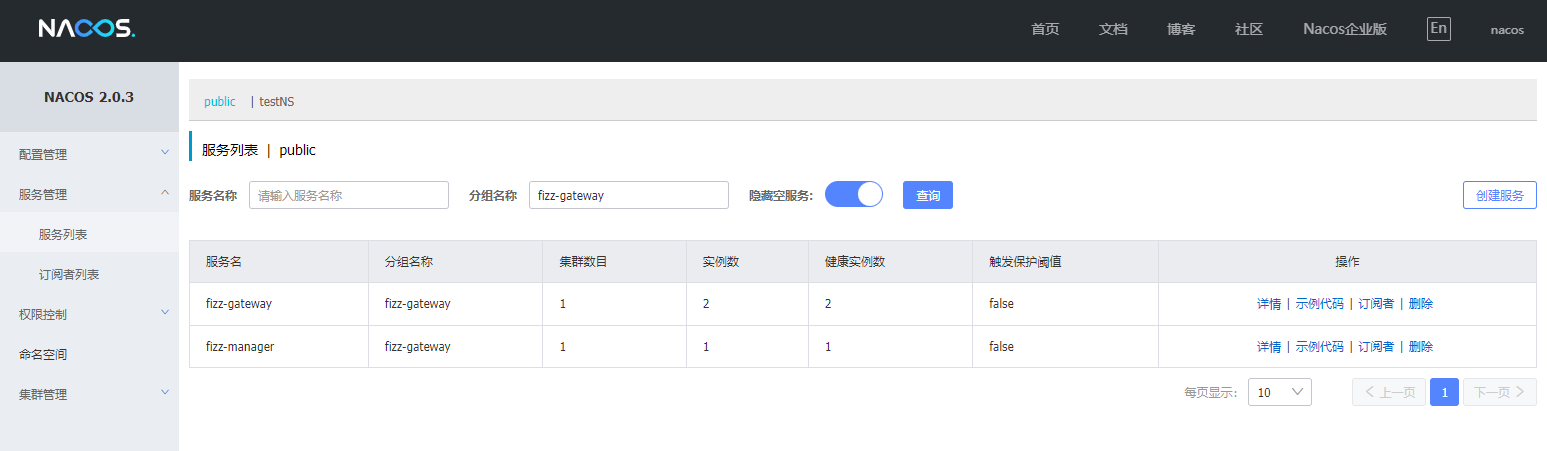
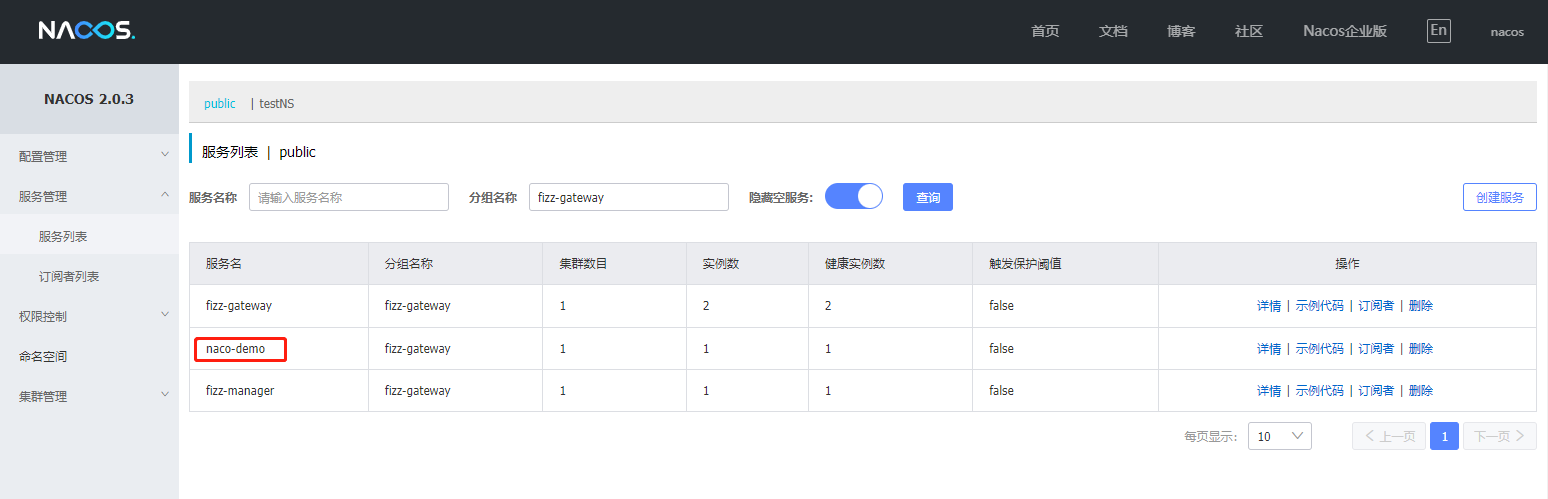
After the configuration is completed, you can see the fizz-manager and fizz-gateway services under the Nacos console -> Service Management -> Service List function, as shown in the figure below:
# Access Nacos configuration center
# fizz-gateway connects to Nacos configuration center
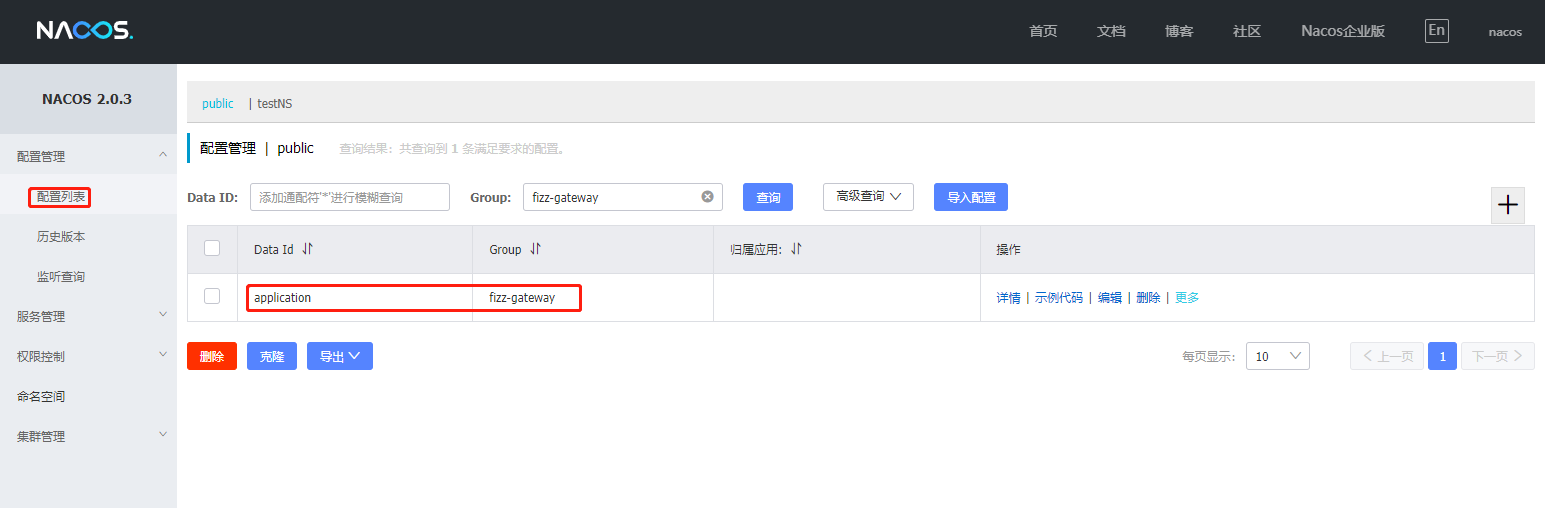
First create configuration information under the Nacos console -> Configuration Management -> Configuration List function, as shown in the following figure:
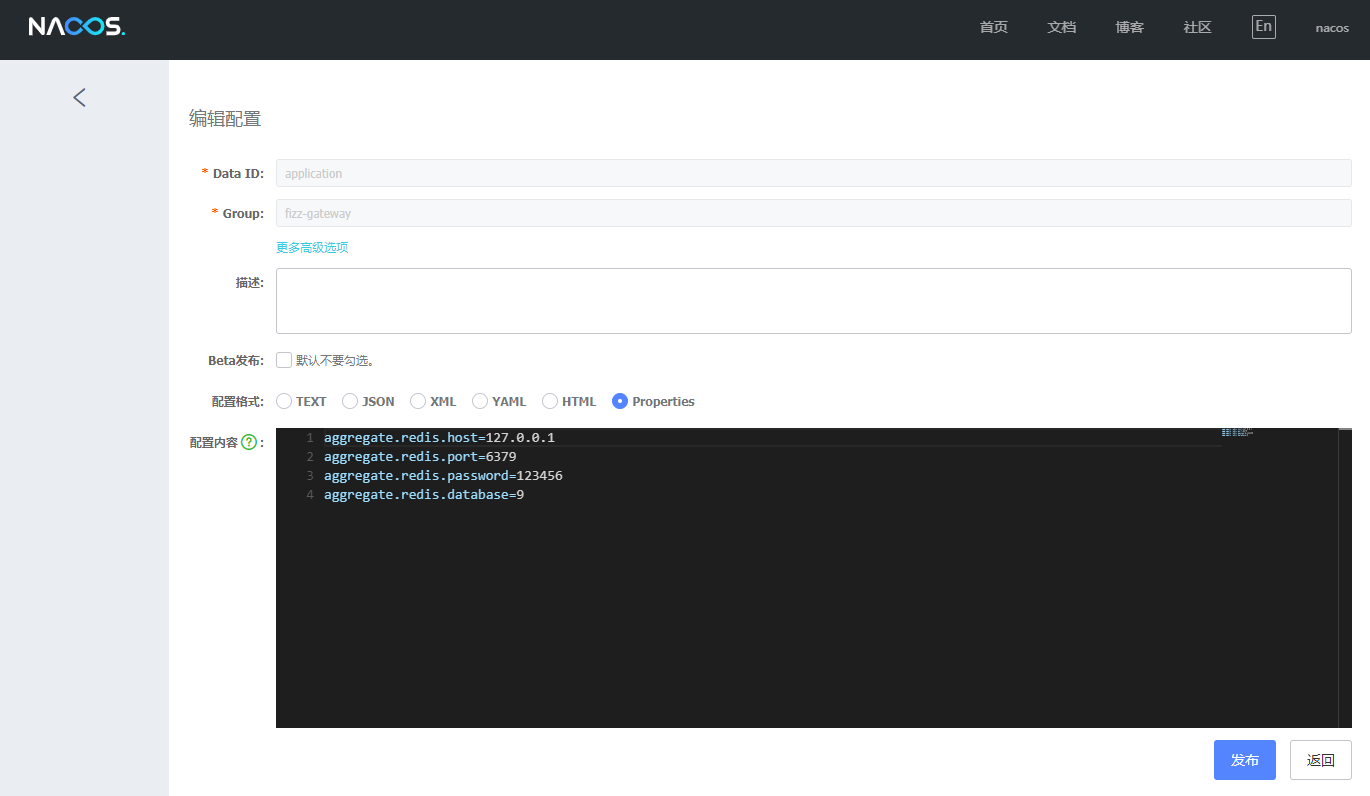
Add configuration information, as shown in the figure below:
Modify the application.yml configuration file and enable the Nacos configuration center. The Nacos configuration is as follows:
spring: cloud: nacos: config:
# if use Nacos config set this flag to true
enabled: true # Set to true to enable Nacos configuration center
# need replace
server-addr: localhost:8848 # Set the IP address and port of the Nacos service namespace: null group: fizz-gateway prefix: application extension-configs[0]: refresh: true data-id: ${spring.cloud.nacos.config.prefix} group: ${spring.cloud.nacos.config.group}
After the configuration is completed, enable the fizz-gateway service and confirm that the service has obtained the configuration information from Nacos.
# Business service call example
Now we register a test service naco-demo into the Nacos configuration center, as shown in the following figure:
naco-demo provides a test interface, which is implemented as follows:
import org.springframework.web.bind.annotation.GetMapping;
import org.springframework.web.bind.annotation.RequestParam;
import org.springframework.web.bind.annotation.RestController;

/**
* demo controller
*
* @author zhongjie
*/
@RestController
public class DemoController {
@GetMapping("/echo")
public Result echo(@RequestParam("msg") String msg) {
Result result = new Result();
result.setMsg(msg);
return result;
}

static class Result {
private Integer code = 0;
private String msg;

public Integer getCode() {
return code;
}

public void setCode(Integer code) {
this.code = code;
}

public String getMsg() {
return msg;
}

public void setMsg(String msg) {
this.msg = msg;
}
}
}
# Use aggregate interface to call business services
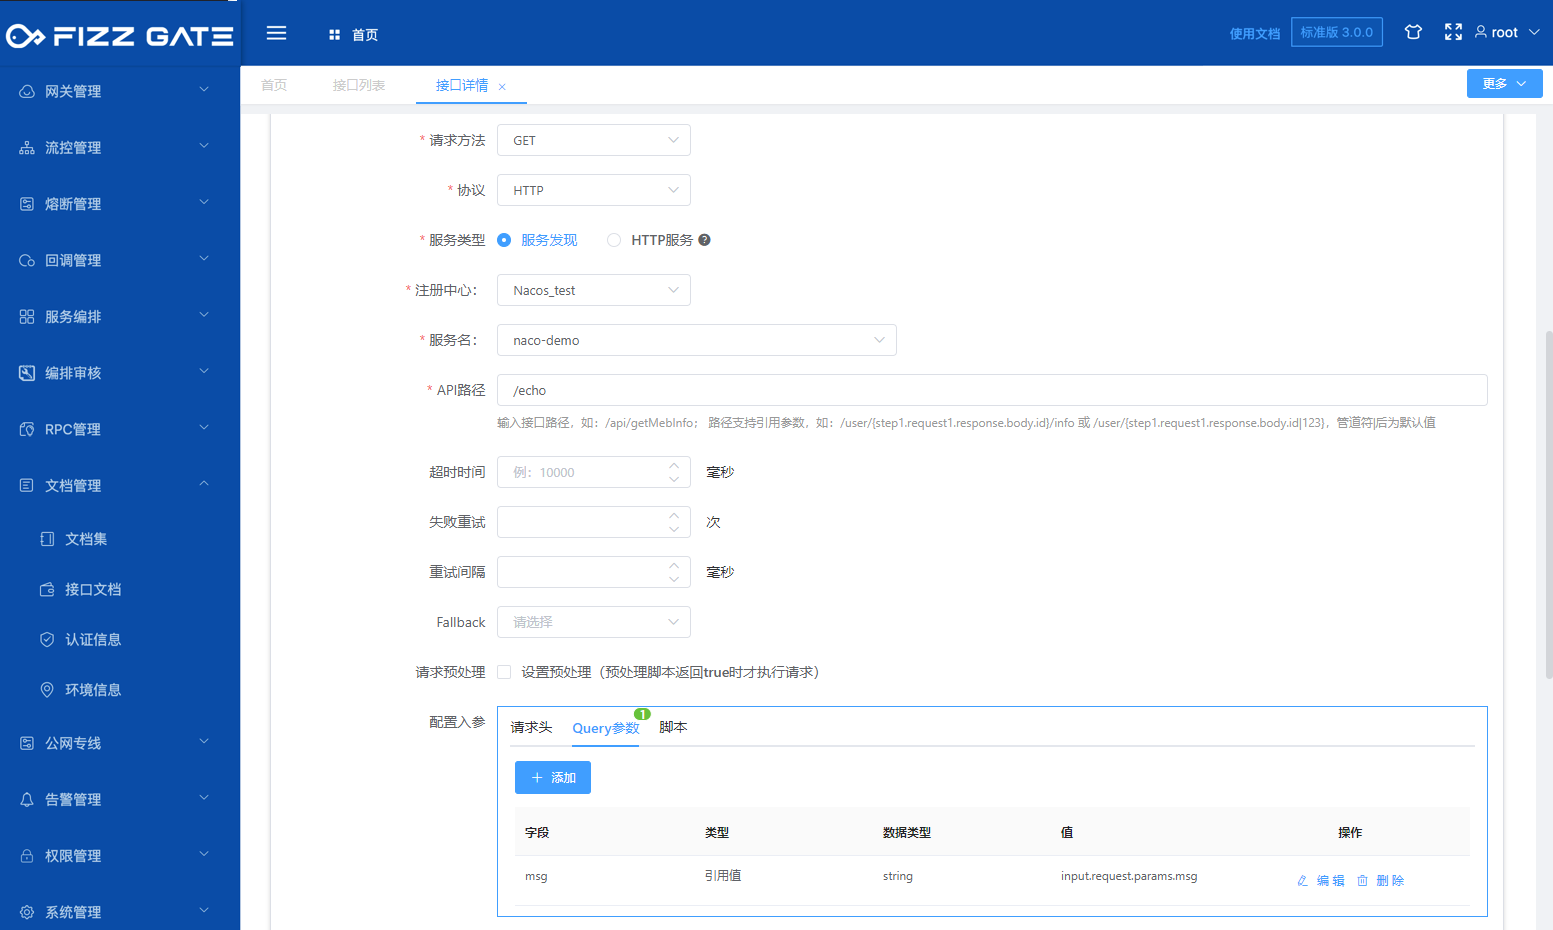
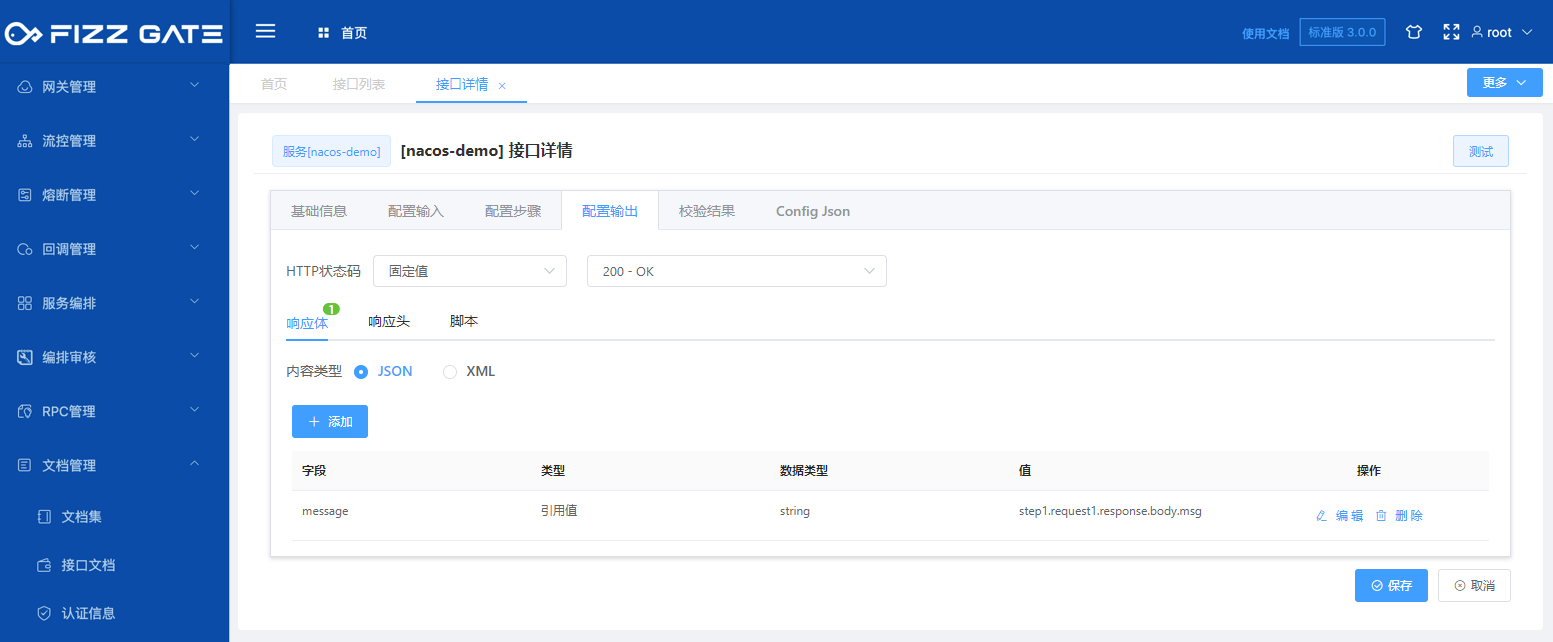
Add an aggregate interface under the management background -> Service Orchestration -> Interface List function and request our test interface through the following configuration:
After the configuration is completed, you can enter the test page to test, as shown in the figure below:
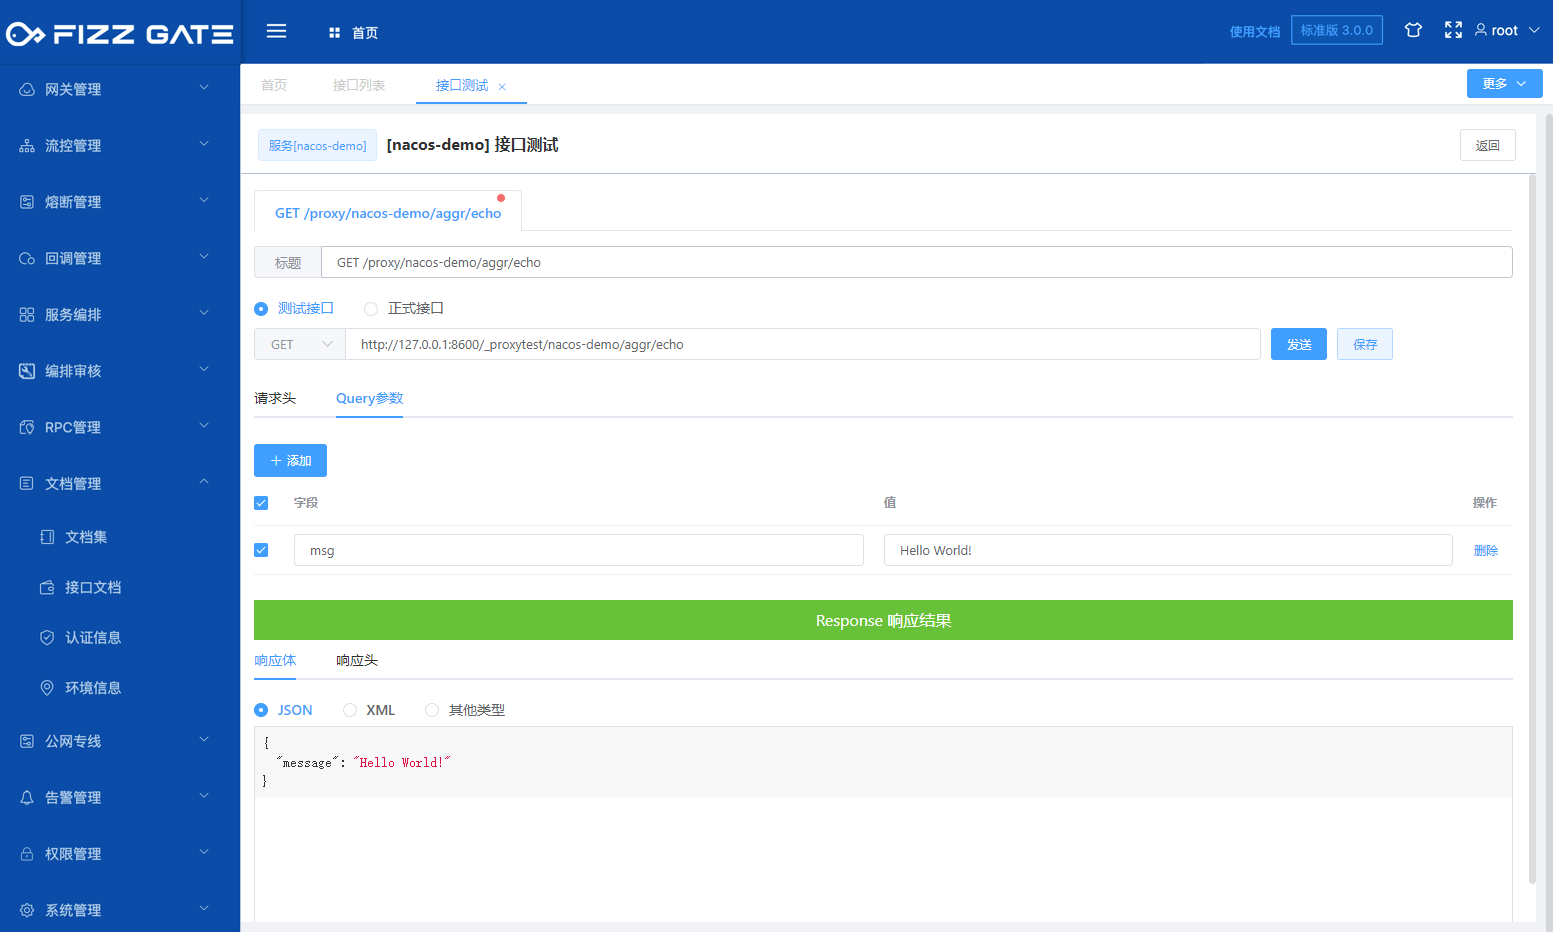
The test is successful, the gateway has called /echo of naco-demo and received a response.
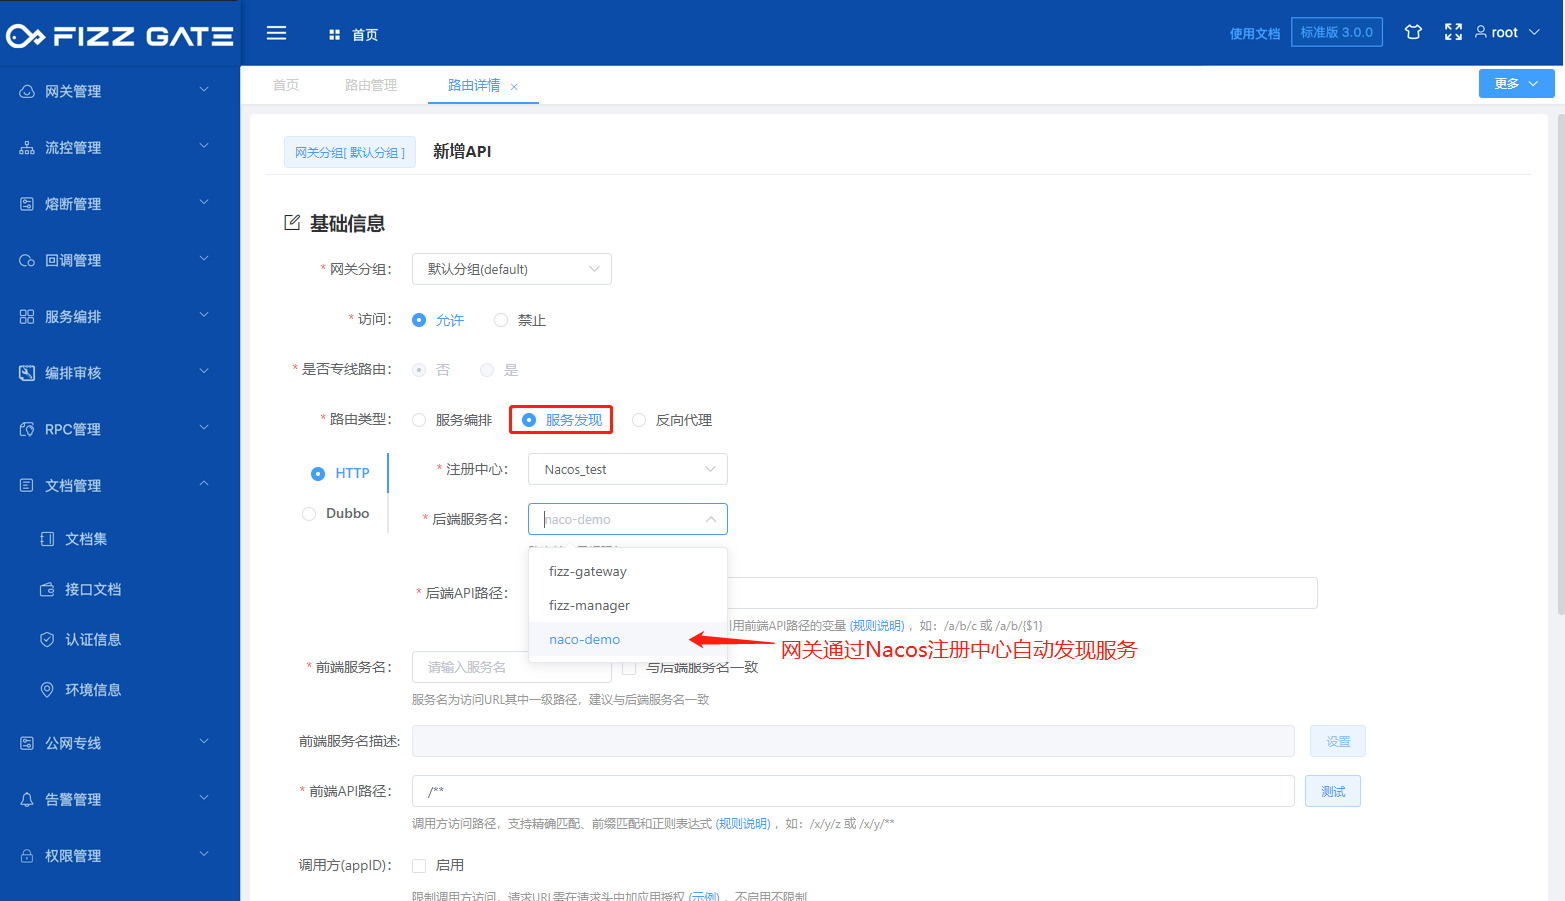
# Use routing to forward requests to business services
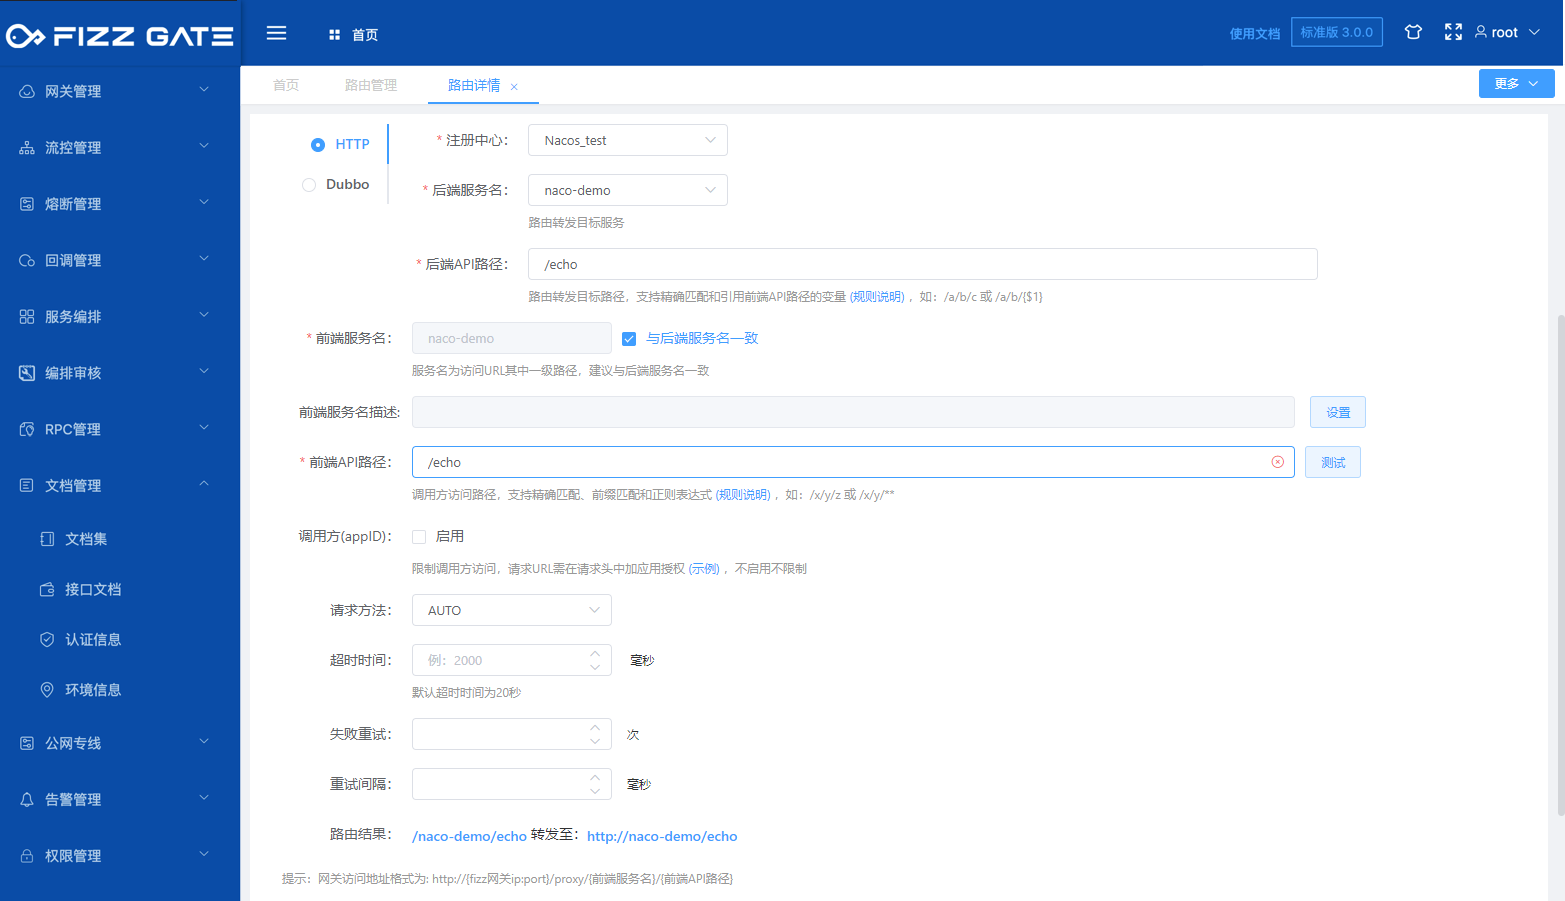
Add a routing rule under the management background -> Gateway Management -> Routing Management function and forward the request to our test interface through the following configuration:
After the routing configuration is completed, call the gateway and obtain the interface response, as shown in the following figure:
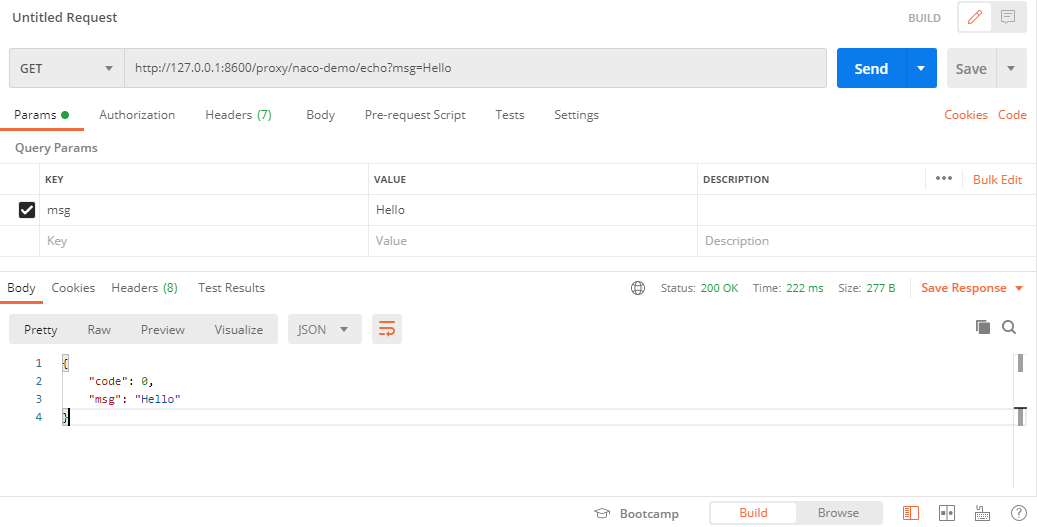
The test was successful, the gateway has forwarded the request to the naco-demo service and received a response.
# Finish
Through the above configuration, Nacos access to the FizzGate integration platform can be achieved.