# Overview
The gateway grouping function is used to maintain grouping metadata, associate the gateway instance IP with the grouping, and implement grouping management of the gateway by configuring different routing policies for different groups.
# Grouping example
Our online business involves To C (individual users), To B (enterprise), and To T (third parties). For different businesses, there will be corresponding machines to accept request access. Different businesses require their own routing strategies, so we divided into groups as follows.
| Group ID | Group name | Description |
|---|---|---|
| default | Default group | The default group is a group created by default in the background. There is no need to specify an IP. Machines that do not belong to other groups are classified into the default group. The default group cannot be modified or deleted |
| c | 2c group | Only accept requests for individual users |
| b | 2b group | Only accepting requests for enterprises |
| t | Grouping for third parties | Only accept requests for third parties |
The following describes the operation of the gateway grouping function.
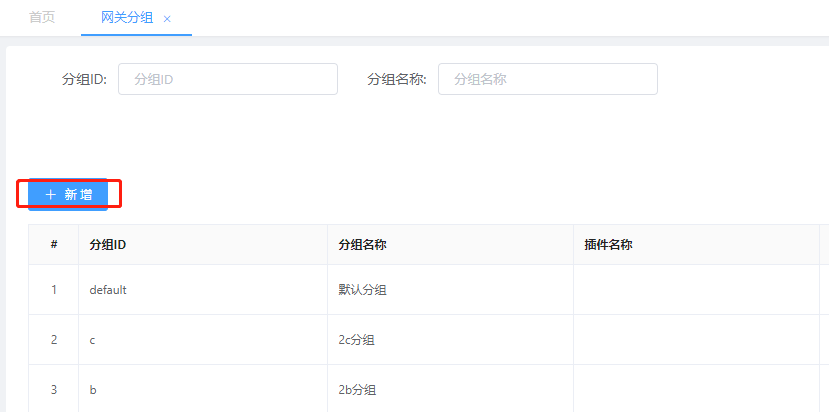
# Group list
Menu location: Gateway Management > Gateway Grouping. Click the menu to enter the group list page, as shown in the figure.

# Add new group
Click the Add button to pop up the new window, as shown in the figure.
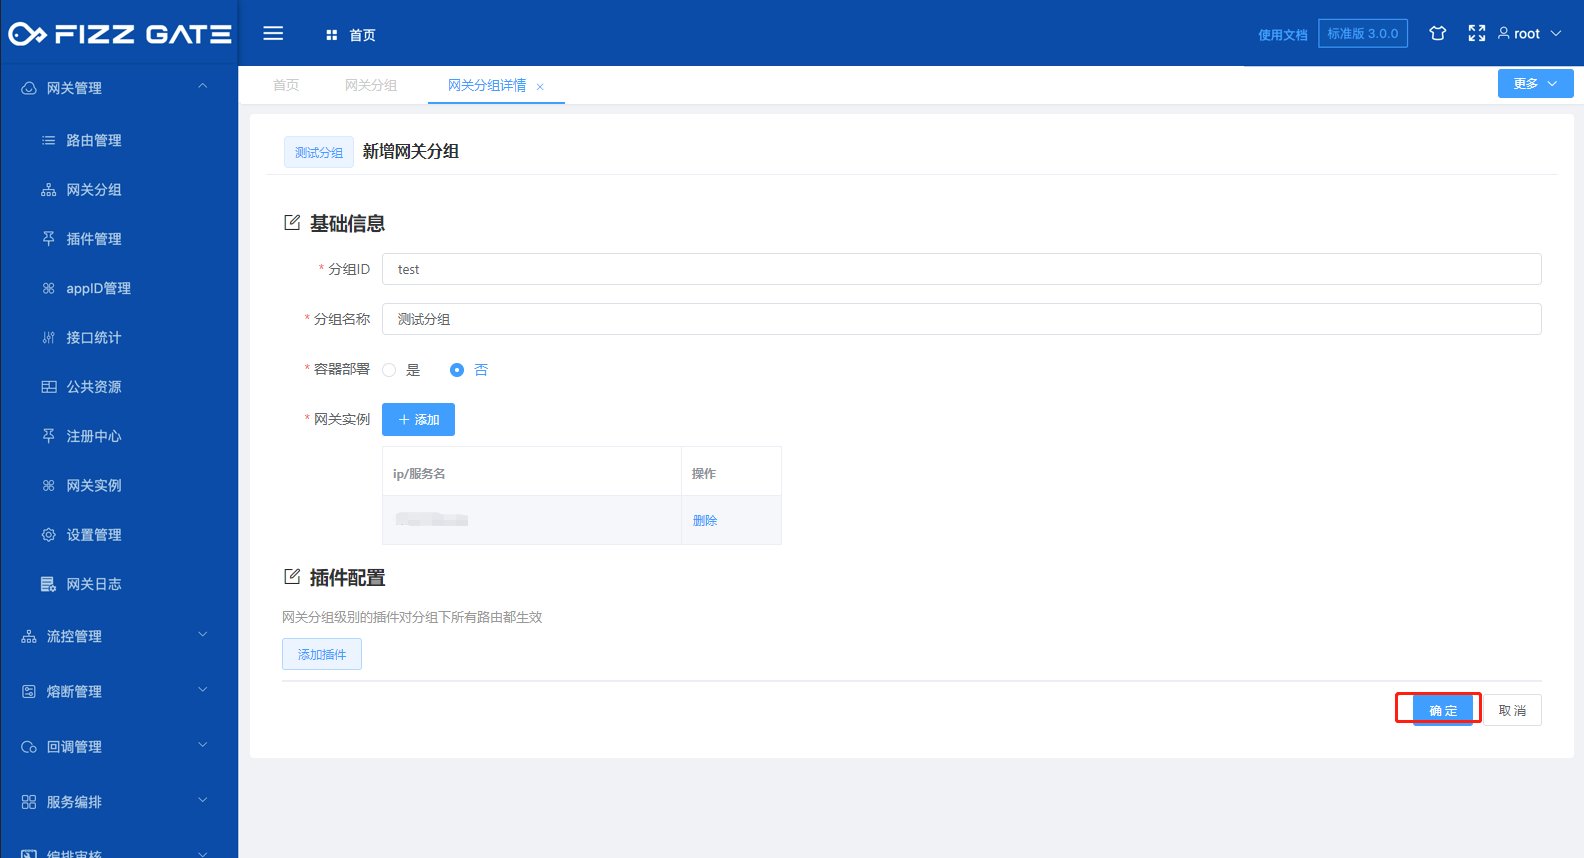
Group ID: The unique identifier of the group, the length cannot exceed 32 characters, required;
Group name: The name of the group, used to display when grouping options, the length cannot exceed 32 characters, required;
Container deployment: Whether the gateway service is deployed through the container. When Yes is selected, the gateway instance can only be divided into groups by service name (the IP address in the container will change with each deployment, so it cannot be divided by instance IP), required;
Gateway instance: The machine IP address/service name in the FizzGate integration platform cluster, required;
After clicking the Add button, a list of gateway instances will pop up, as shown in the figure.

Click By Instance IP to display the IP list of the gateway in the cluster, check the IP to be added to the group, and click OK to add the gateway instance, as shown in the figure.

Click By Service Name to display the service name list of the gateway in the cluster, check the service name to be added to the group, and click OK to add the gateway instance, as shown in the figure.

Plug-in configuration: Group-level plug-in configuration. The configured plug-in takes effect on all routes under the group. Optional.
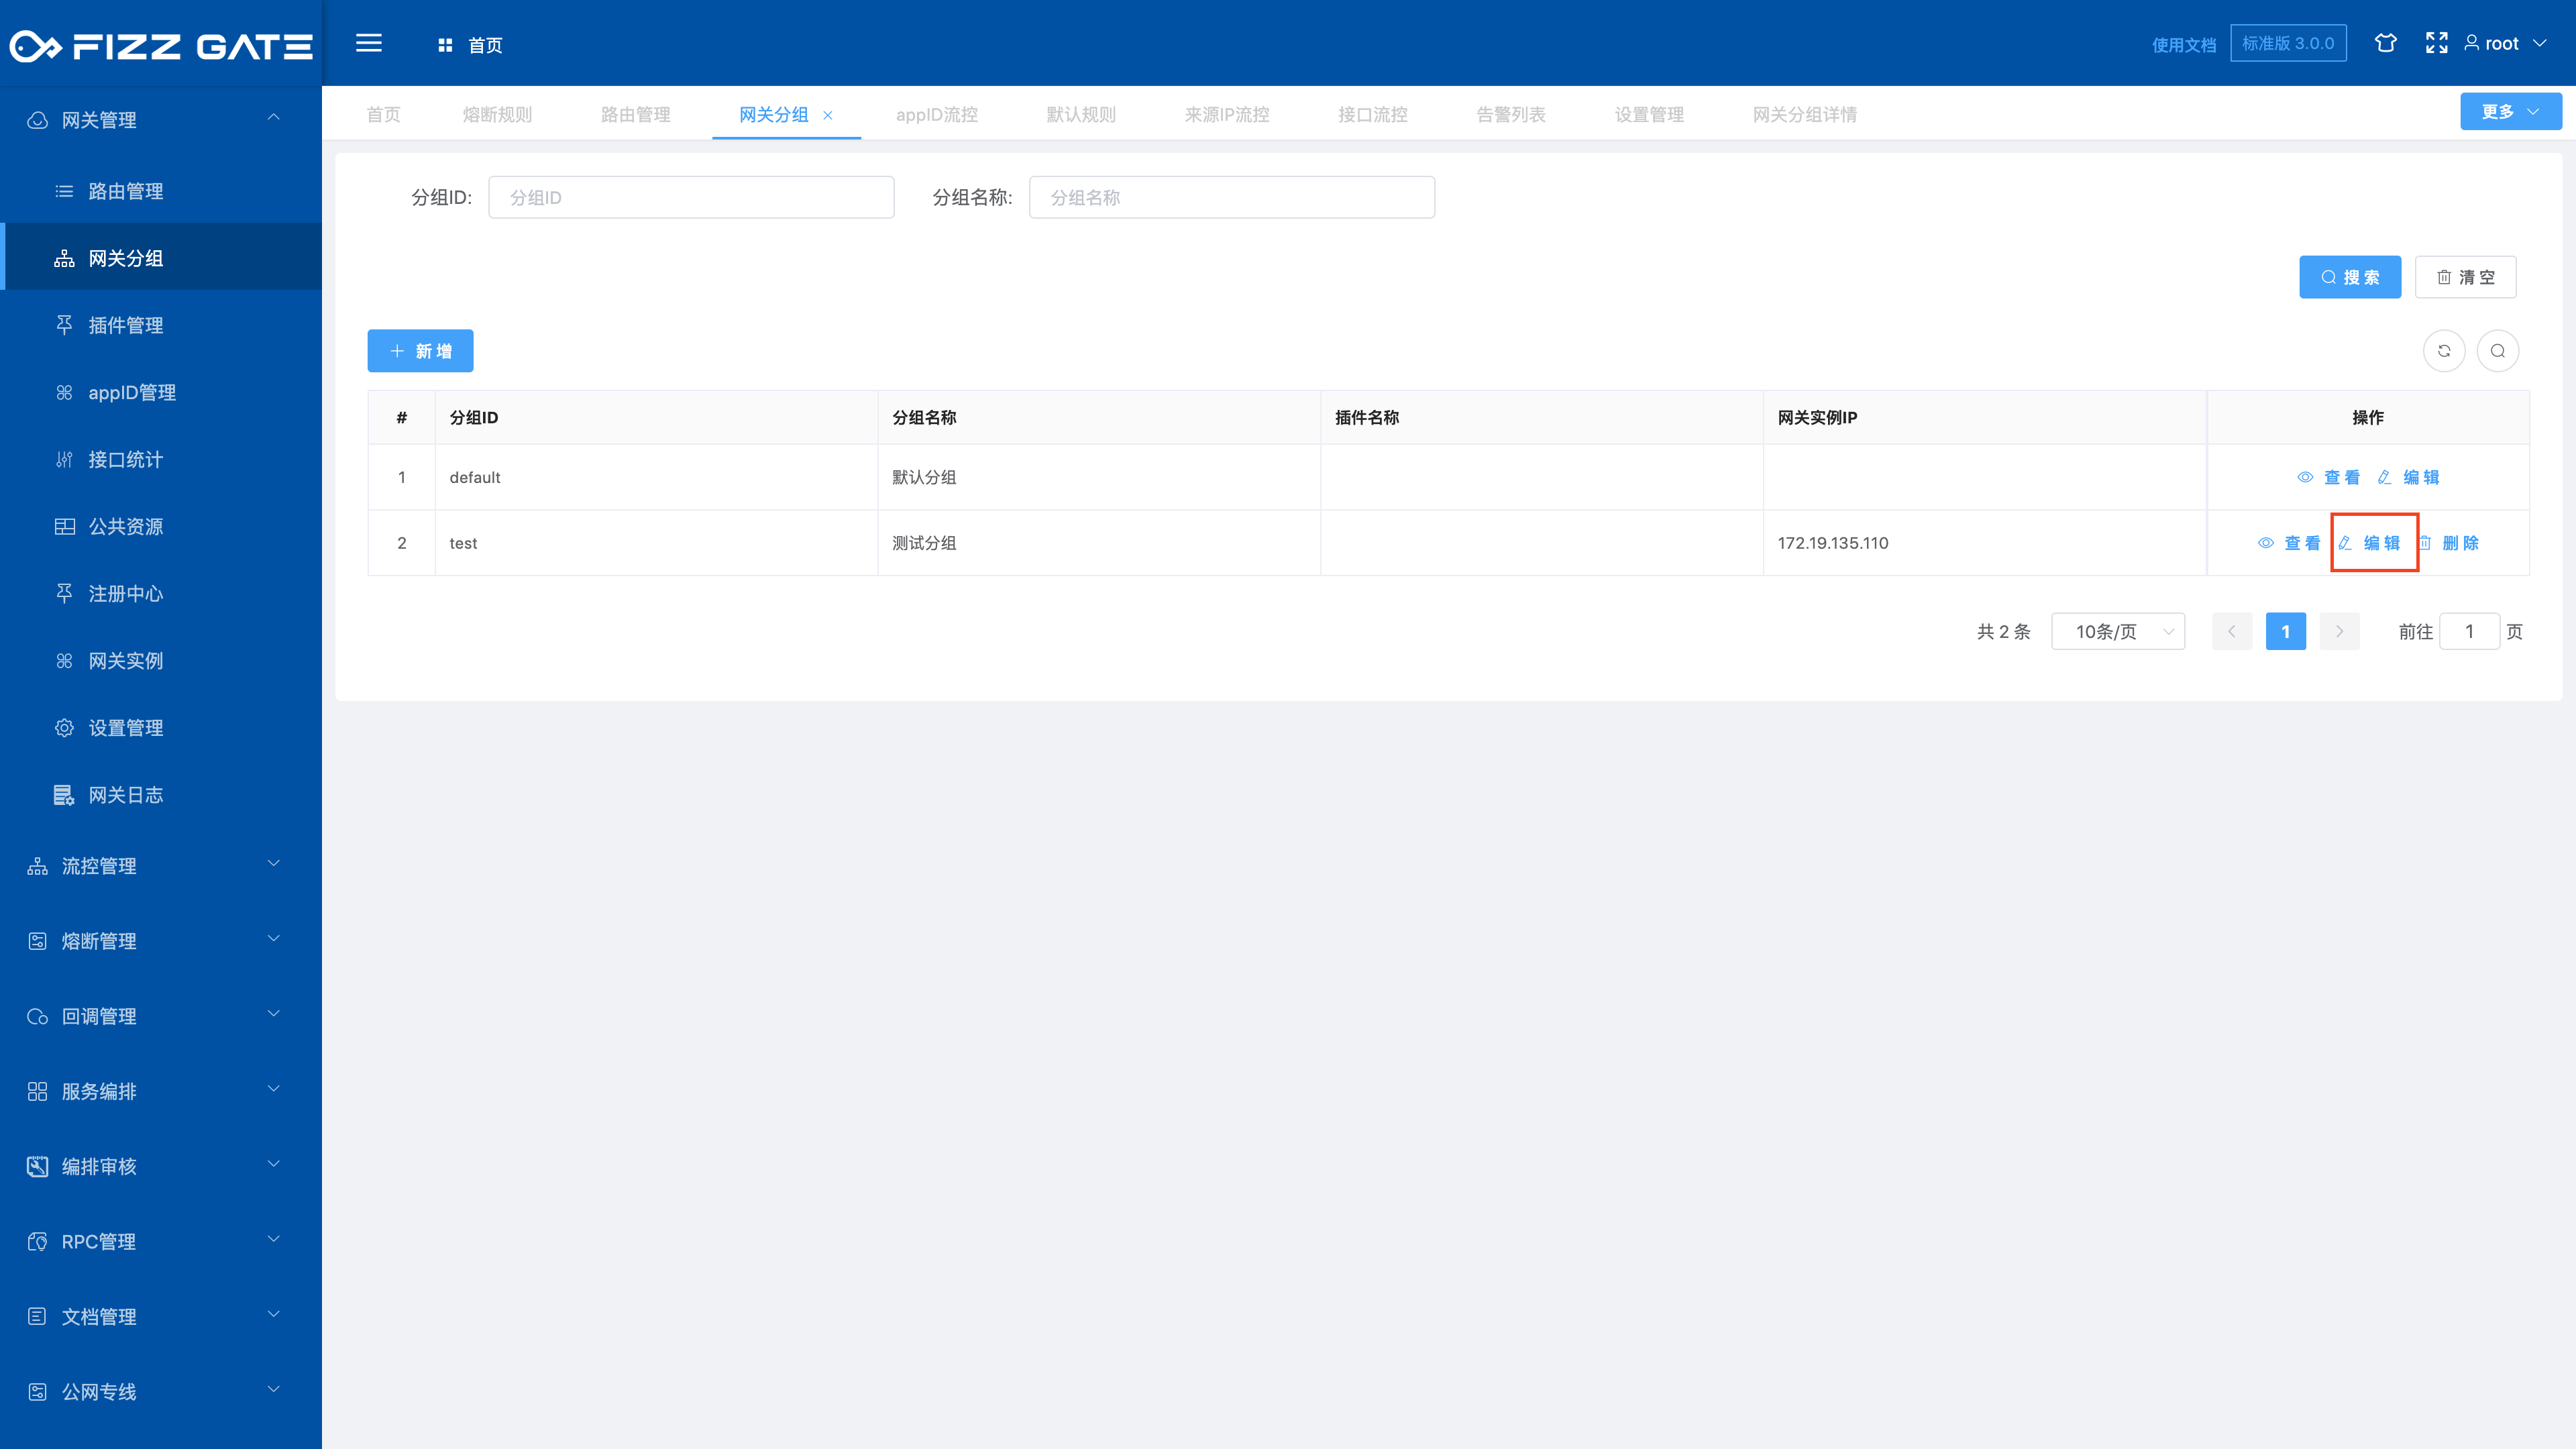
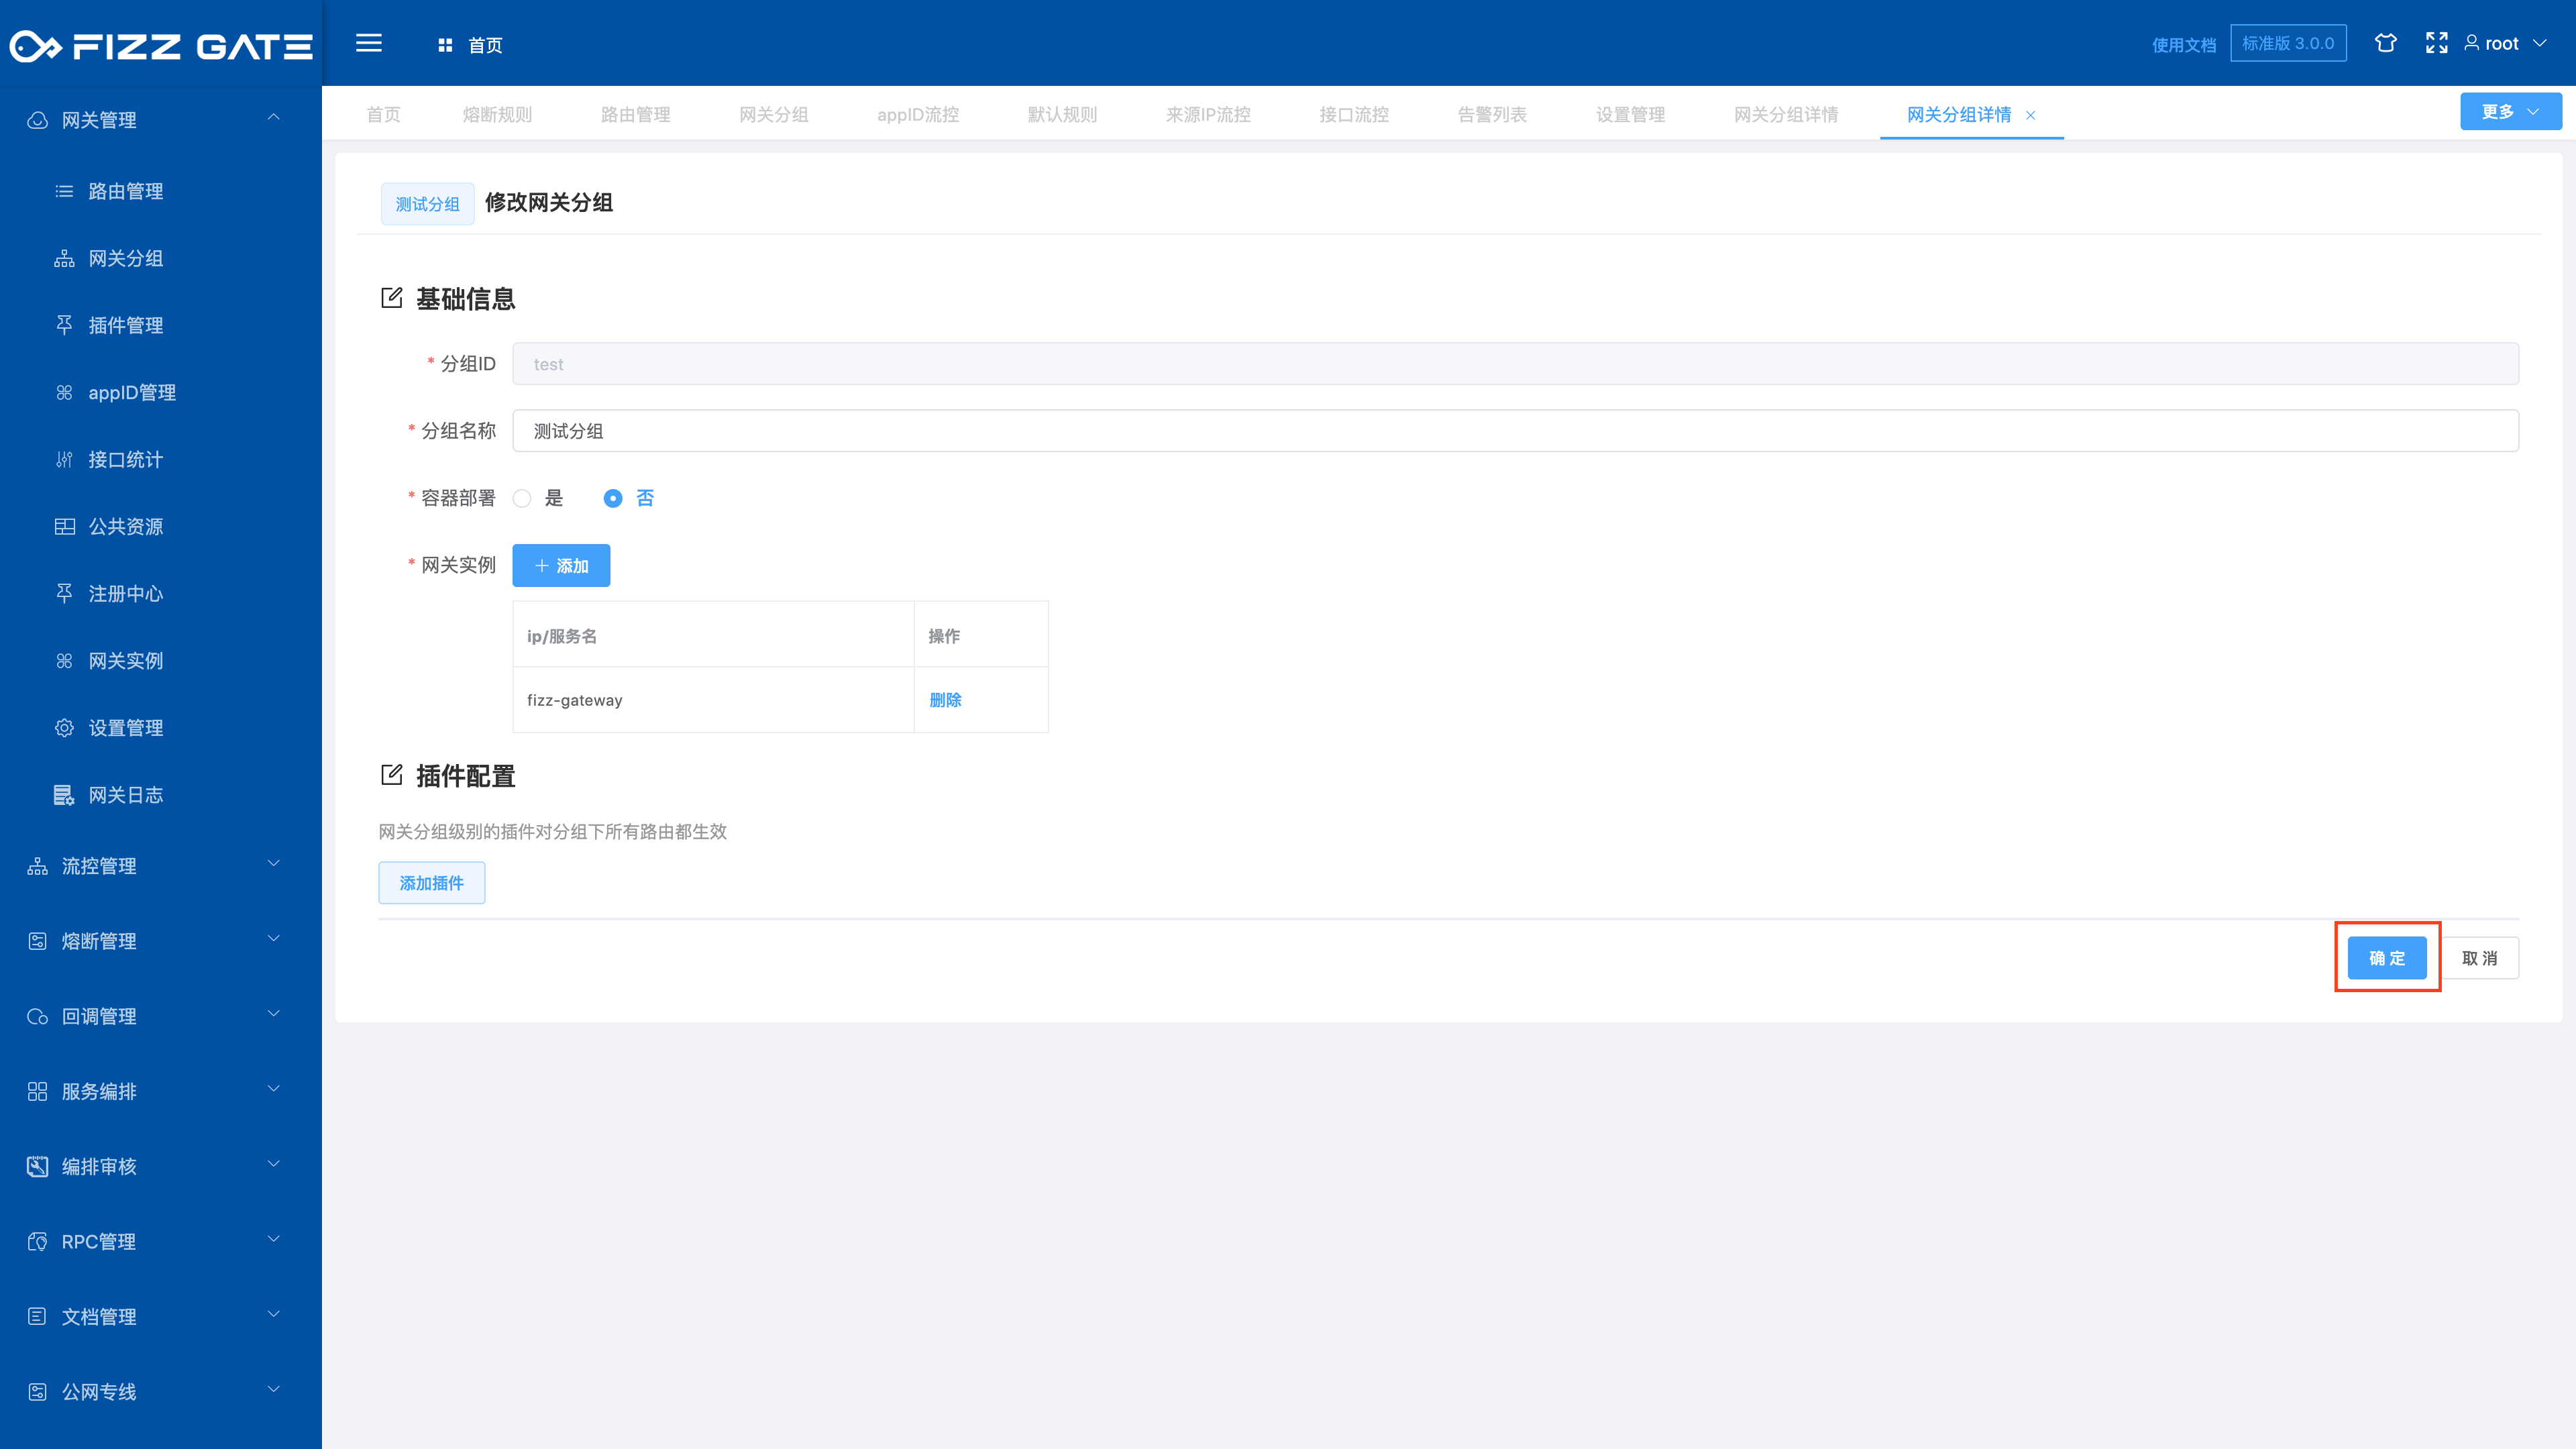
# Edit group
Click the Edit button to pop up the editing window, as shown in the figure.
# Delete group
Click the Delete button to pop up the deletion confirmation window, as shown in the figure.


Click the OK button to delete the gateway group. If the gateway group has associated routing configurations, you need to delete all associated routing configurations before you can delete the group.